
V123 Unassigned Playlist, Sample Delete Safety, Gmail Filters, Gmail Auto-Label Guide
Two useful features in the latest V123 update, and two useful Gmail features for regaining control of a crazy inbox

This week:
V123 new feature: Visible Unassigned Playlist
V123 new feature: Sample Delete Safety Failback
Gmail Filters
Gmail Auto-Label Guide
V123 New Feature: A Visible Unassigned Samples Playlist!
Hooray! This is a lovely change!
Previously, all of your unassigned samples were in an invisible playlist, and there was no way to get rid of them or even to add them to a visible playlist. It was all glitched out.
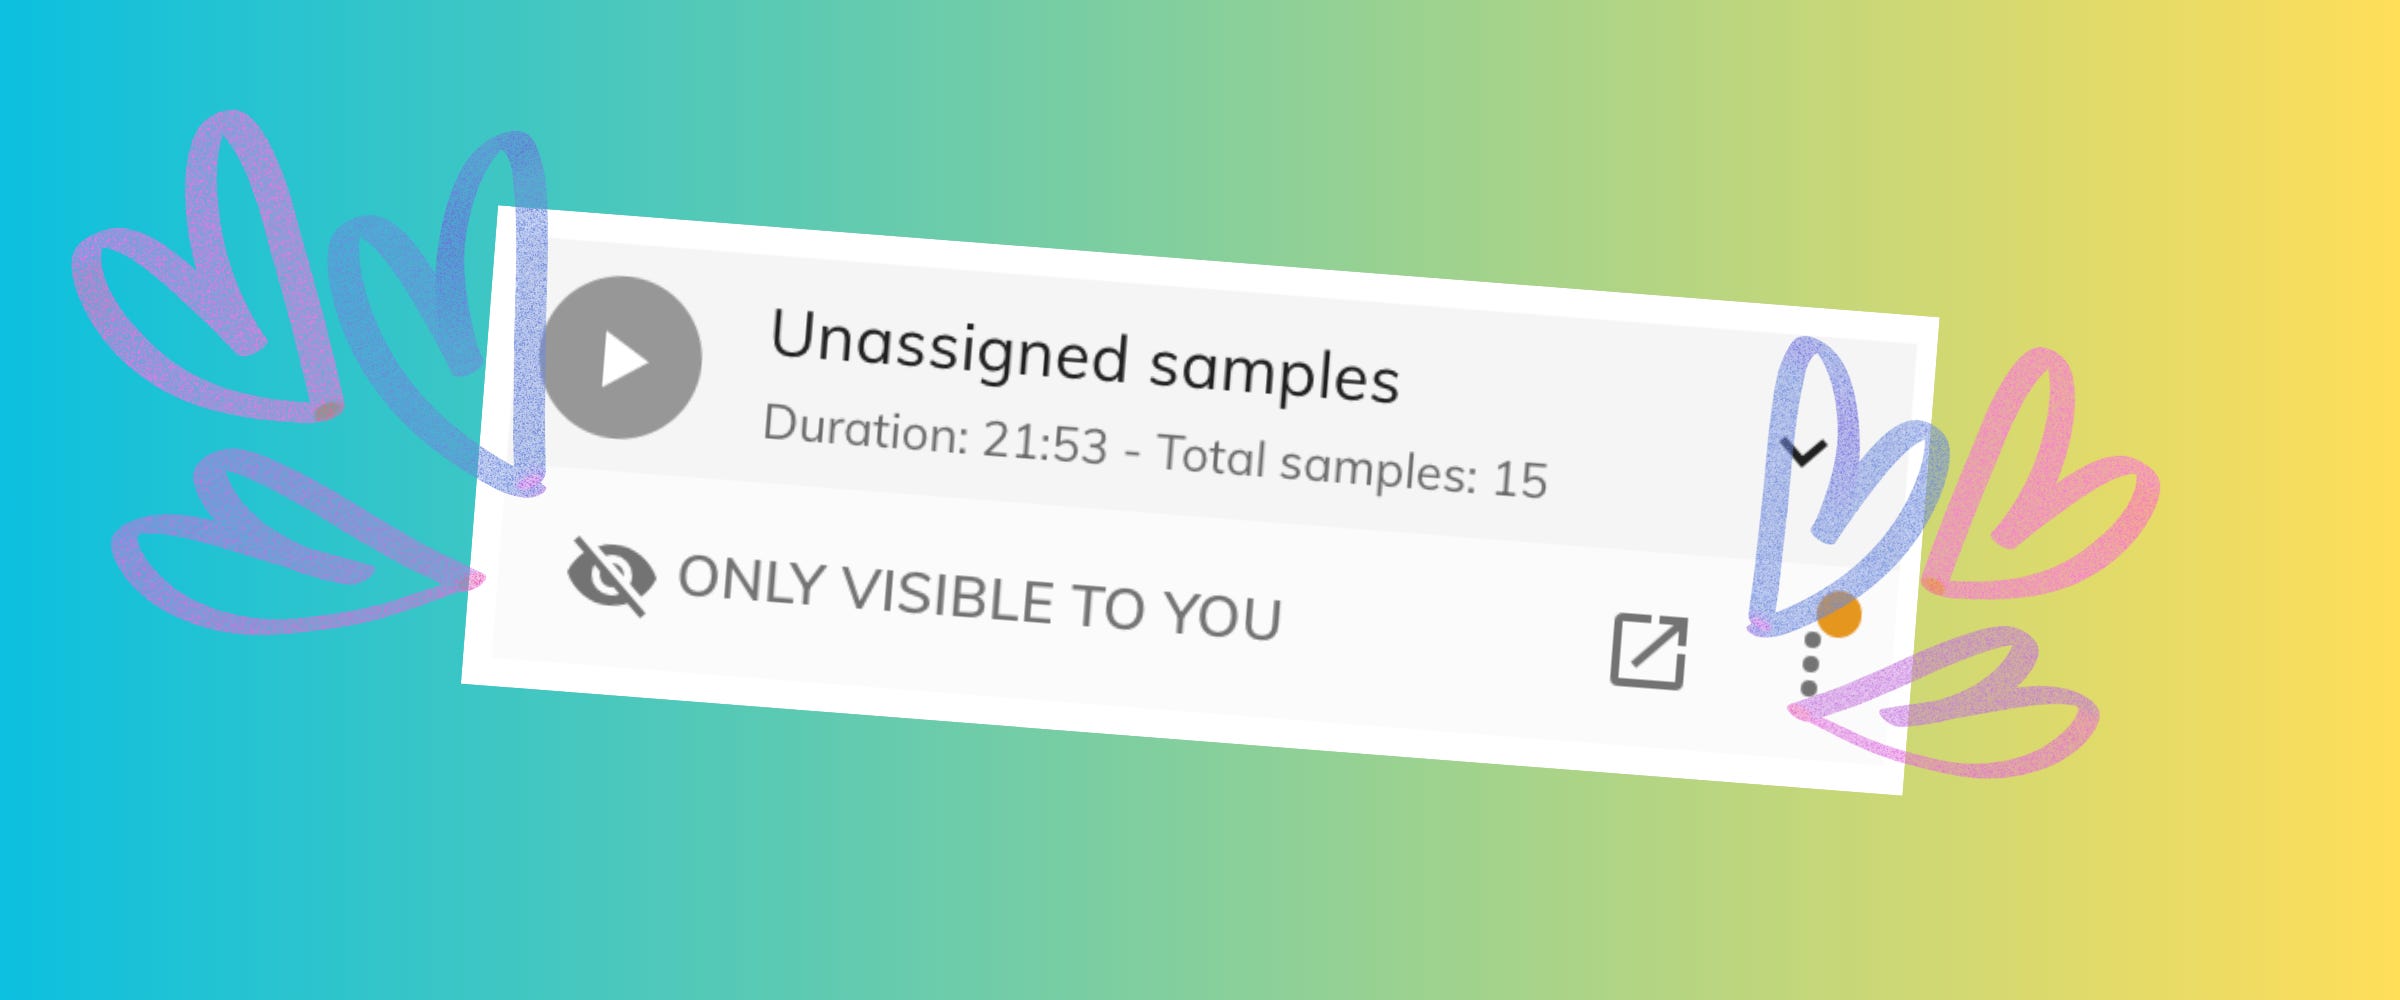
Now, you will see that your last playlist is actually Unassigned samples! It’s only visible to you when you’re logged in.

V123 New Feature: Sample Delete Safety Fallback
Another really useful update!
Previously, if you accidentally deleted a sample or a playlist, recovering it was annoying. You could go to your cloud and if it was still there, download it, and then re-upload them one by one. Or you could reach out to support for help.
But now when you delete a sample, it goes to the Unassigned playlist!
That’s super useful because you can easily move it back to the original playlist if you want to restore it. :)
EMAIL HELL
Do you use Gmail? Does your inbox vex you to death? This might help you!
I’ve been struggling the past couple months with being sick, with my tools needing to be re-built, and then with trying to catch up with the endless emails I’ve gotten to multiple inboxes across a couple different businesses. It’s kicked my ass, and I’ve missed emails. Last week I asked for anyone who has a good email system to please reach out to me, and I’d still love you to do that, but as I have been working through emails and catching up with clients, I’ve added a couple easy, light-weight systems this past week to my Gmail that might help you, too! They got me from 1500 unread emails down to 750.
The first thing I did is actually embarrassingly obvious: Add Gmail Filters!
Gmail Filters
The problem: My inbox is a mix of emails from clients and notification emails from software/subscriptions/receipts.
The solution: Add a filter to each repetitive non-urgent kind of email, so they skip my inbox and automatically go to either Updates or Social or Receipts.
How to do this:
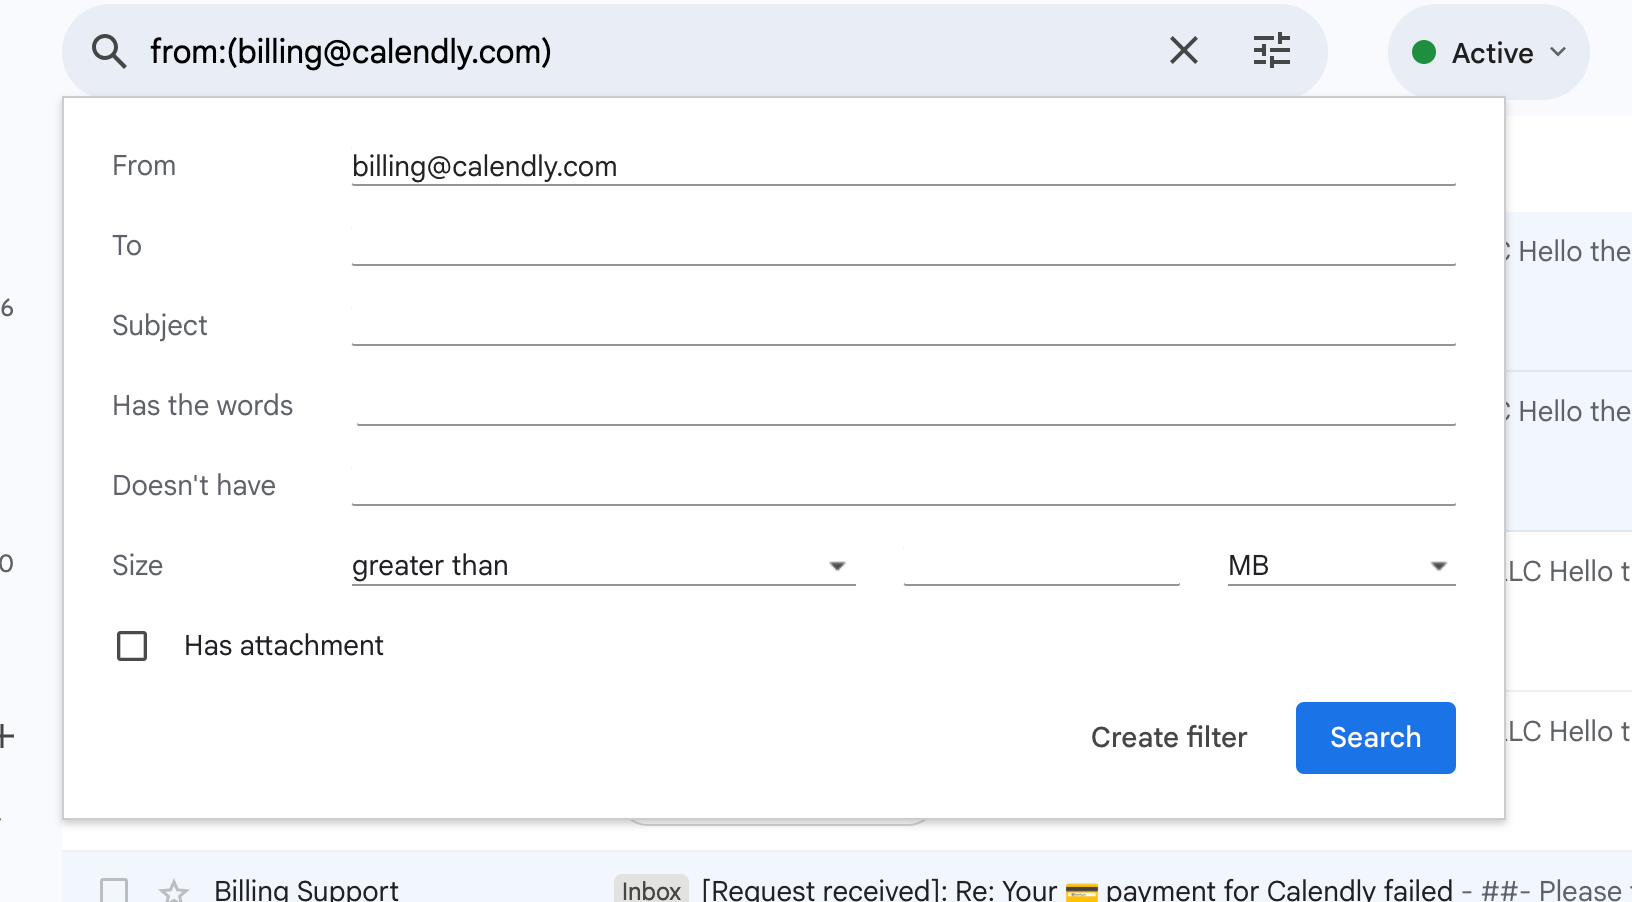
Go into an email that you want to filter, click the three vertically-stacked dots, and choose “Filter messages like these” from the drop-down menu. That will open a card at the top of your screen that looks like this:
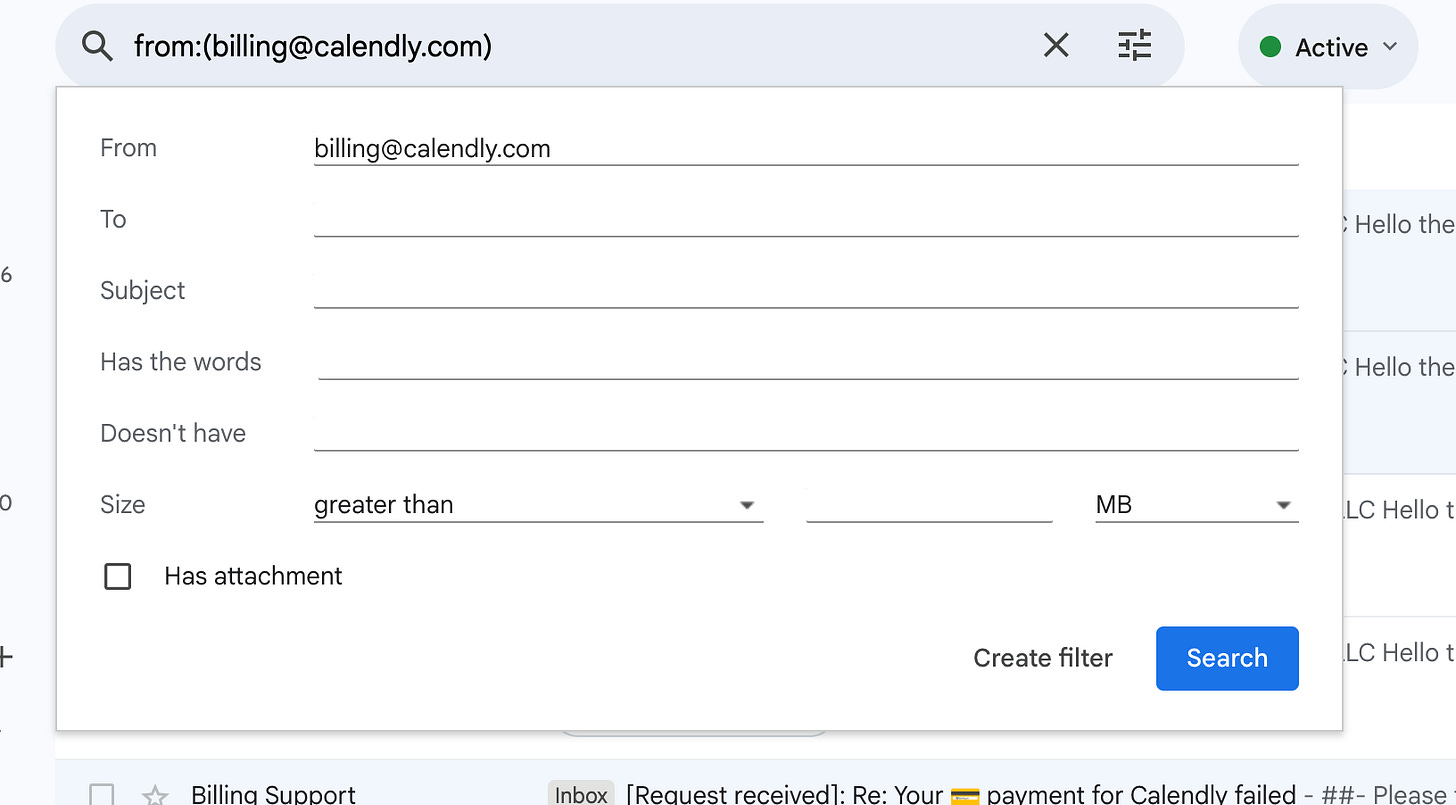
If you want all emails from that email address to be caught in the filter, then the email address should be in the From field. Then click “Create filter” at the bottom.
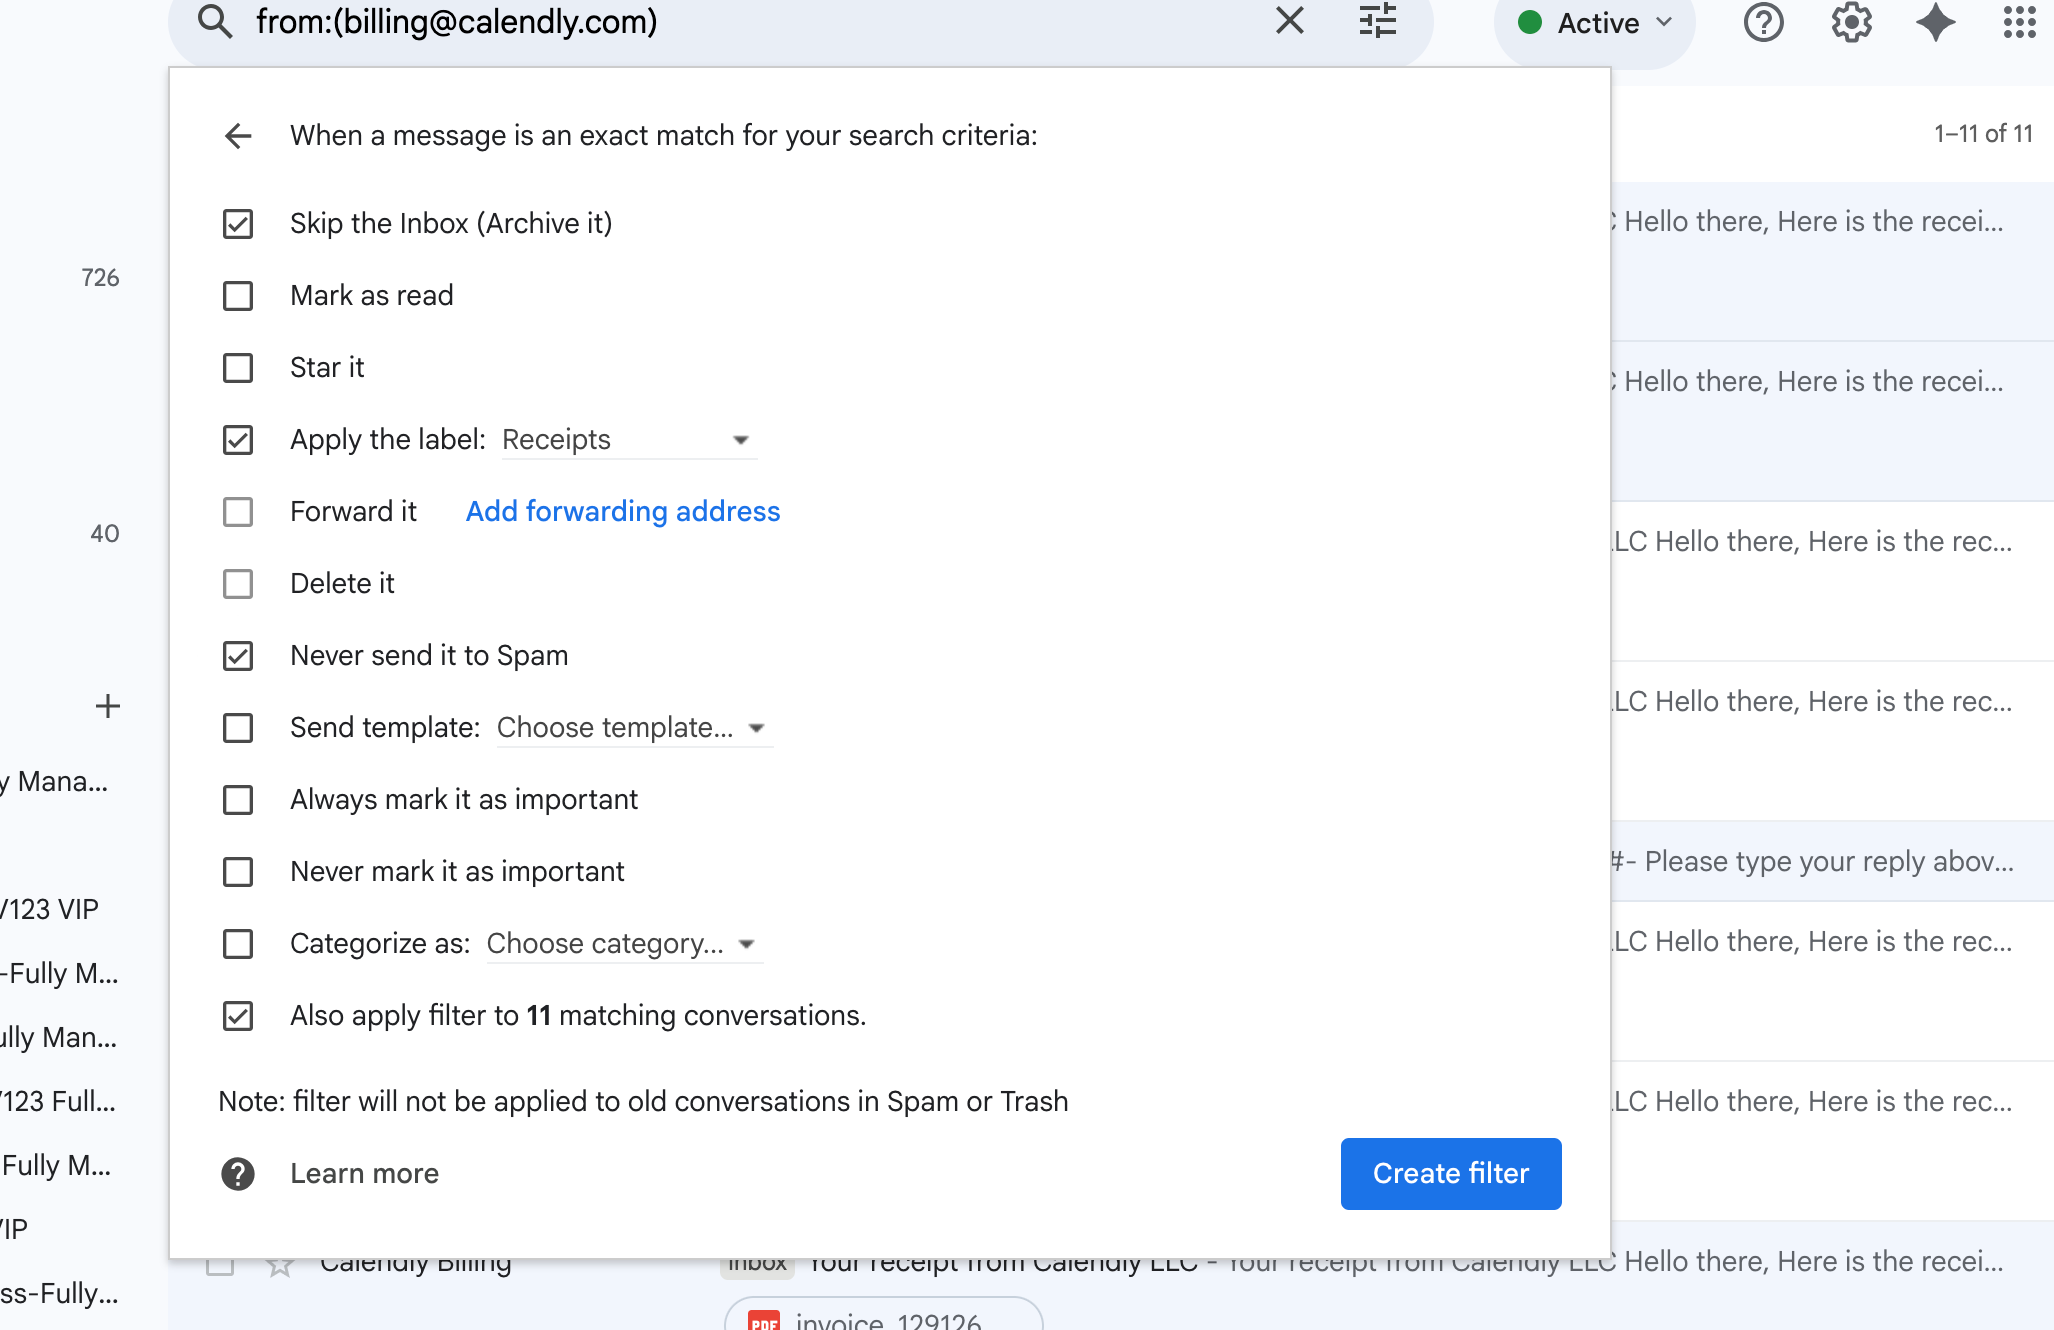
The next card that you’ll see lets you customize the filter. In this example, I have chosen an email I get every month from Calendly that has an invoice, and I want it to skip my inbox and go straight to Receipts. I never want emails from here to go to spam, and I want this to apply to all the previous emails I’ve gotten from Calendly, too. Tick the options you want for your filter! Then click “Create filter” and boom.
Here’s another example of a different filter. For this one, I’ve picked emails that I regularly get about Google Workspace. I want all of these emails to go to Updates, which is not a custom-made label, but actually a pre-made category that all Gmail email accounts have.

Obvious? Yeah. It’s still saving me valuable time, to do this! I made 3 more filters while taking these screenshots, and my unread emails went from ~750 to 682.
But I don’t want to have to manually do this for all the emails I get from or send to clients, so I went one step further: Add a system that will automatically create labels, and automatically add those labels to all my client emails!
Gmail Auto-Label Guide
No matter what CRM you use, or even if you don’t use a CRM, you can set this up with Zapier or Make. If you’re totally new to automations then use Zapier, and if you don’t want to invest $20/mo for Zapier, then use Make.
How it works overall:
All your contact email addresses go into column 1 of a Google spreadsheet, and the Gmail label you’d like to use for that contact goes into Column 2.
Every day (or however often you want it to happen) a Google Script runs and adds those labels to emails to/from that contact.
That’s it! Super simple.
For me, I get sales on my website, which triggers Zapier to add the new client’s email to the spreadsheet, and also add the Gmail label that I want for that client to the spreadsheet.
For you, you might set it up so that every time you add a new person to your CRM, it triggers Zapier/Make to add that client’s email to your spreadsheet, and then add the Gmail label you want to use to the spreadsheet. Or if you already keep all your clients on a giant spreadsheet, then all you need to do is add a column to your spreadsheet and type in what you want their Gmail label to be! Easy.
If you want help setting up Zapier or Make to do that, just let me know! Happy to put together video guides for your specific situation.
Next step: Create a Google Script that runs once a day and automatically labels all emails according to your Google Spreadsheet.
Here’s how to do that:
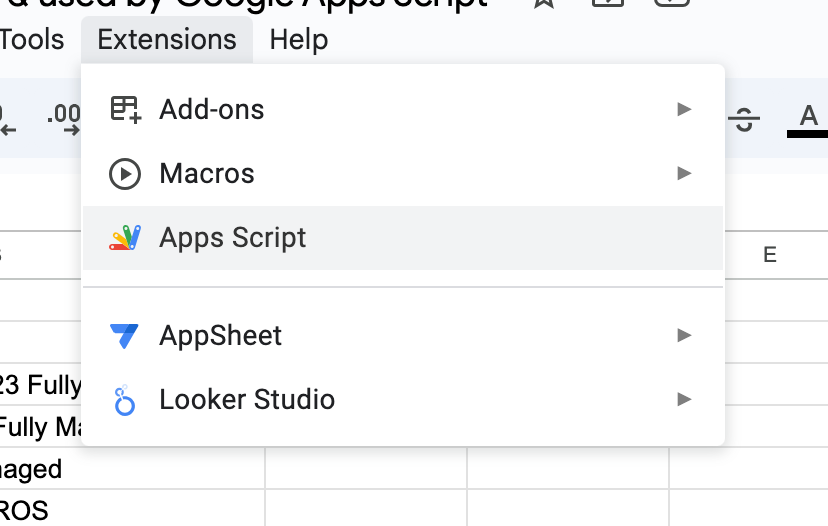
Open your Google Sheet, and click on Extensions. Choose Apps Script from the drop-down menu.

That will open a new page with a little bit of code on it. Delete the code that’s there, and copy/paste in this:
function labelClientEmails() {
  // Your spreadsheet ID
  var sheet = SpreadsheetApp.openById('COPY_THIS_PART').getSheetByName('Sheet1');
  var data = sheet.getDataRange().getValues();

  console.log('Found ' + (data.length - 1) + ' clients to process');

  // Skip header row, process each client
  for (var i = 1; i < data.length; i++) {
    var clientEmail = data[i][0]; // Email in column A
    var labelName = data[i][1];   // Label name in column B

    if (clientEmail && labelName) {
      try {
        // Get or create the label
        var label = GmailApp.getUserLabelByName(labelName);
        if (!label) {
          label = GmailApp.createLabel(labelName);
          console.log('Created new label: ' + labelName);
        }

        // Search for emails from/to this client from the last 3 days
        // Excluding trash and emails that already have this label
        var searchQuery = '(from:' + clientEmail + ' OR to:' + clientEmail + ') ' +
                         'newer_than:3d ' +
                         '-in:trash ' +
                         '-label:' + labelName.replace(/ /g, '-');

        var threads = GmailApp.search(searchQuery, 0, 100); // Process up to 100 threads per client

        if (threads.length > 0) {
          // Apply label to found threads in batches
          label.addToThreads(threads);
          console.log('Labeled ' + threads.length + ' threads for ' + clientEmail + ' with label: ' + labelName);
        }

      } catch (error) {
        console.error('Error processing client ' + clientEmail + ': ' + error.toString());
      }
    }
  }

  console.log('Labeling complete!');
}

// Optional: Test function to run manually and see what would be labeled
function testLabelingForOneClient() {
  var testEmail = 'test@example.com'; // Replace with an actual client email to test
  var searchQuery = '(from:' + testEmail + ' OR to:' + testEmail + ') newer_than:3d -in:trash';
  var threads = GmailApp.search(searchQuery, 0, 5);

  threads.forEach(function(thread) {
    console.log('Would label: ' + thread.getFirstMessageSubject());
  });
}
Go back to your Google Sheet, and copy this part of the URL:
https://docs.google.com/spreadsheets/d/COPY_THIS_PART/edit
Just copy the part that I’ve labeled COPY_THIS_PART. It’s a long string of numbers and letters.

That is your Google Sheet ID. Even if you change the name of your Google Sheet, or move it to a different location in your Google Drive, it will never change. :)
Now go back to the Google Script. Look on Line 3, see where it says: ‘
SpreadsheetApp.openById('COPY_THIS_PART').getSheetByName('Sheet1');Paste your Google Sheet ID that you copied in the previous step into the COPY_THIS_PART part of the code.
Make sure to leave the parentheses on the left and right of it.
Example:

If you changed the name of the sheet/tab to something other than the default Sheet1, then update that, too. In the example right above this, my tab name is actually Clients.
Hit the Save button! It looks like a floppy disk.
Then click Run.

At the bottom, you’ll see the log where it tells you if it’s worked. :)
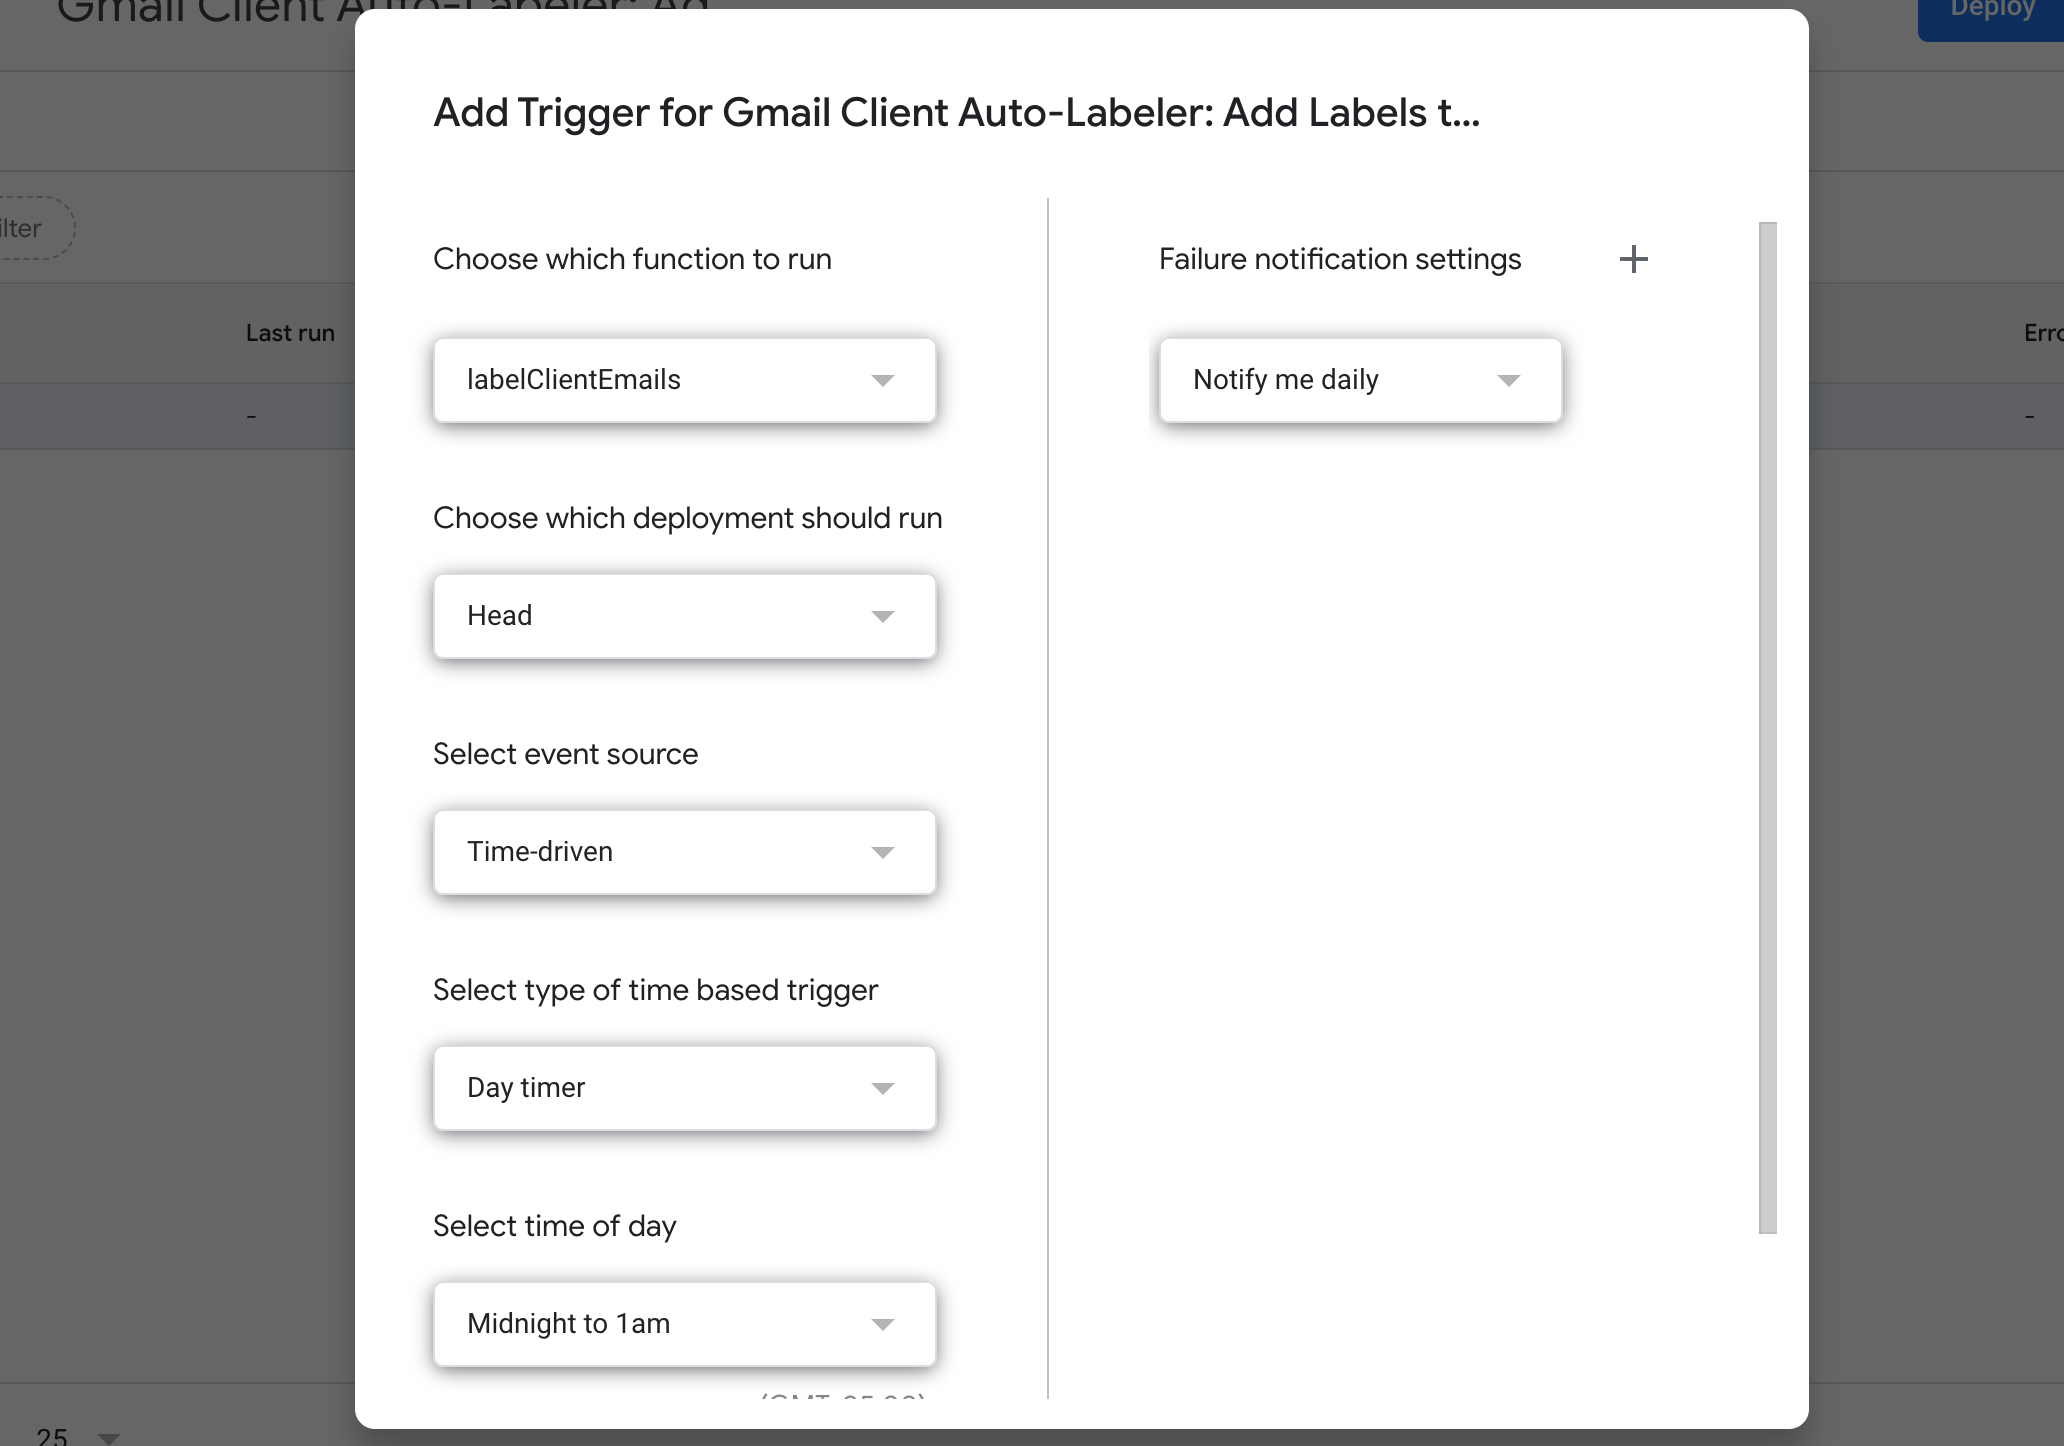
Now that this script is all set up, we need to tell it to automatically run once a day. So click on the alarm clock icon on the left side of the screen, and then click the “Add a trigger” button on the bottom right. Here are the settings to choose, in order for it to run once a day, between midnight at 1am:
labelClientEmails
Head
Time-driven
Day timer
Midnight to 1am

Scroll down and click Save.


ALL DONE! This script is set up to automatically run once a day, and add labels to/from emails based on your spreadsheet. It will do this for all emails in the past 3 days, will not add labels to emails in the trash, and will not add labels to emails that already have a label on them. (You can adjust all those settings in the script.)
Hope this helps!
Best,
Nikki